You have your strongback all set up and leveled, the forms are mounted and aligned, and the strips are all cut and milled – ready to strip? Not yet. You still must build the first parts that will be mounted on the mold and become integral parts of the canoe. That would be the stems.
When strips are bent around the forms, the ends must meet or be terminated in some mechanical fashion to form the ends of the canoe. The simplest stem is no stem at all, where the strips are simply glued together where they meet. This type of construction requires a good fiberglassing job inside and out, and excellent construction practice in joining the strips. If this type of non-stem were used, it would seem to me that the nagging doubt about its strength and durability would be with me any time I paddled the boat. I would prefer to eliminate this variable by using a laminated solid stem. This type of conventional inner stem is recommended for the first time builder, and is the subject here. Experimenting with stemless boats is best left for an experienced builder.
What wood?
Ash is a popular wood for stems although it is not universally available. Any wood that bends easily can be used, such as cherry, cedar, pine, spruce, walnut, etc. Cherry often will bend beautifully, other times it will crack for no apparent reason. It will also break if it has grain run out – where the direction of the grain changes such that it runs out of the strip before the end. For making inner stems I prefer spruce, reserving the harder ash for seat frames or outer stems. Spruce is readily available from construction and framing lumber, and if you root through the pile at the lumber yard, clear pieces of 2 x 4, 2 x 6, etc., can generally be found. It bends readily when heated, takes glue well, and is easily shaped to a rolling bevel. Despite the difficulty in getting a good glue up on occasion, ash makes an excellent outer stem.
Whatever wood you choose for your stems, it should be clear, straight, and straight grained. The orientation of the grain should be flat to the surface to be bent. This is just the opposite of the vertical grain orientation desired for strips. The flat grain responds much easier to bending.
Making the Bent Laminations
It is not difficult to make laminated stems. The classic method is to cut three or four strips of the wood to be laminated, steam or soak them until they are pliable, and bend the entire stack around the canoe’s stem form. C- clamps are placed to hold the stack to the form. The stack is allowed to dry thoroughly, then is glued together and C- clamped once again on the stem form.
As mentioned, I use spruce. As for strip thickness, I prefer to use thinner strips, on the order of 3/16" or even 1/8". The number of strips is enough to make a stem about 3/4" thick. The width is about 7/8" so that after cleanup, the glued stem will be a generous 3/4" wide. The length should be three or four inches longer than that required to go from the keel end to the sheer, as measured around the stem form.
Bending
With Dry Heat
Rather than using steam or a hot soak to soften the spruce laminations for bending, I decided to try a method for using a heat gun to bend strips that I originally saw described in an Internet forum . The laminations I used were 1/8" thick spruce, 7/8" wide. I have no idea how well this method would work with other wood. The heat gun used was capable of blowing heated air at temperatures that can scorch the wood if not held a safe distance away and kept moving. This type of heat gun is readily available in hardware stores for stripping paint, softening floor tiles, and numerous other tasks around the home.
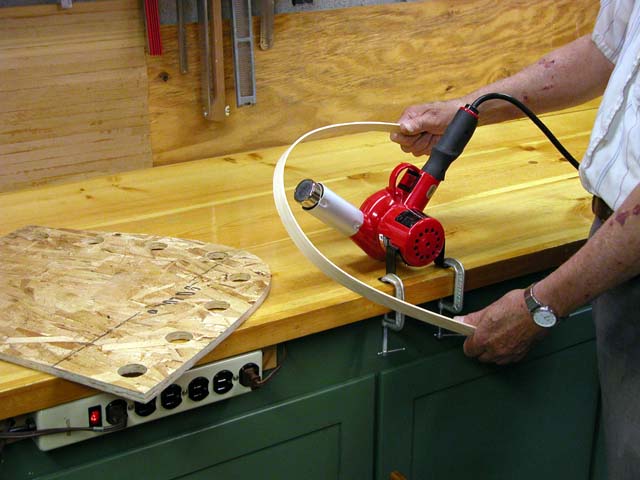 A
lamination strip is held at the ends and a gentle bending force applied
while holding it about an inch away from the hot air discharge.
The
lamination very soon relaxes against the bending force, and can be bent
quite easily. Placing the bent
strip on the bending form to check its shape reveals where to next apply
the heat, and this process is continued until the strip fits the form.
The final result is laminations bent much more precisely to the
shape of the bending form than is possible with either steam or hot soak bending.
A
lamination strip is held at the ends and a gentle bending force applied
while holding it about an inch away from the hot air discharge.
The
lamination very soon relaxes against the bending force, and can be bent
quite easily. Placing the bent
strip on the bending form to check its shape reveals where to next apply
the heat, and this process is continued until the strip fits the form.
The final result is laminations bent much more precisely to the
shape of the bending form than is possible with either steam or hot soak bending.
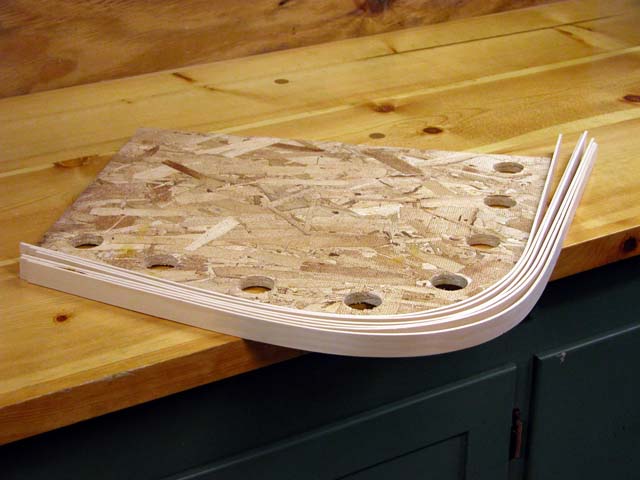 The entire
process of bending all of the laminations for a single stem blank takes less time than it would take to heat up
the steamer or hot water. The
added benefit of being able to glue the laminations as soon as they cooled
is significant – no drying out time required. The entire set of six
laminations shown here took well under an hour to bend, after which they
were immediately glued.
The entire
process of bending all of the laminations for a single stem blank takes less time than it would take to heat up
the steamer or hot water. The
added benefit of being able to glue the laminations as soon as they cooled
is significant – no drying out time required. The entire set of six
laminations shown here took well under an hour to bend, after which they
were immediately glued.
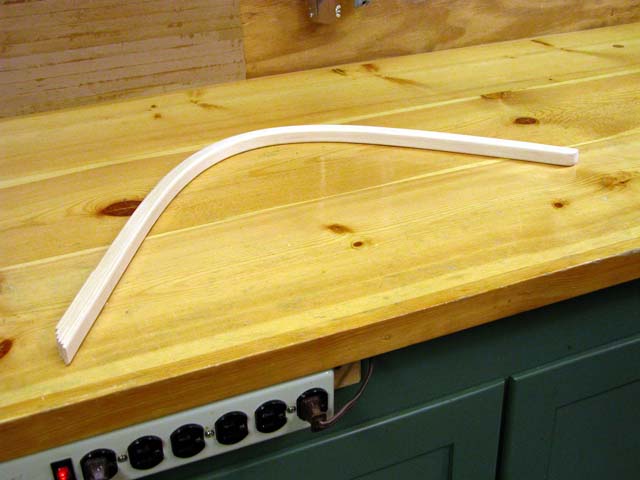
Another plus to be gained by using dry bending is the glue can be applied to the entire while laying on the bench, and then transferred and clamped to the bending form. It's possible to bend the laminations to nearly perfect shape, which then require little clamping force to bring the glued stack to shape around the form.
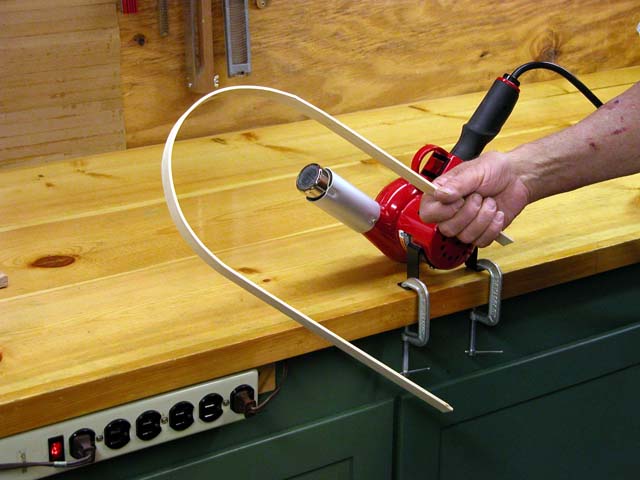
An extreme bend to demonstrate the method.
Gluing them together
I generally prefer not to use epoxy for wood-to-wood joints, reserving its use for gluing wood parts to surfaces already coated with epoxy, such as gluing inwales and outwales to a fiberglassed hull. One exception is gluing on an outer stem, where the ends of the cedar strips are all or part of the gluing surface. Cedar absorbs epoxy quite readily, especially end grain, producing a very deep bond. When making seat frames using mortise and tenon joints, I may use epoxy if the joints could benefit from some gap filling. Using epoxy to glue stem laminations is not structurally required, but it can be used to advantage to gain tack time. The tack time of PVA glue is quite short, and gluing stem laminations with it can be somewhat frustrating when trying to C-clamp the stack once the glue has begun to tack. The fact that the laminations were bent with the heat gun to near-perfect shape makes it a bit easier to use epoxy rather than PVA glue. A previous version of this article recommended using Titebond or Titebond-II, but it is tricky to get good tight joints if the glue has tacked before the C-clamps are placed. In spite of the potential messiness using epoxy, the extremely long or non-existent tack time is an attractive reason to use it. I have epoxied over fifty laminated guideboat rib blanks roughly twice as wide as the canoes stems described here, and have gotten excellent joints without the frustration of premature tacking. Also, roughing up and presoaking the spruce is not required as it is for hardwoods like cherry or ash.
To use epoxy, mix a batch using 1 oz. of resin and 1/2 oz. of slow hardener. This is a little more than will be required, but is easy to measure. (See Fiberglassing - 101 for more info on mixing and using epoxy.) Be sure to mix it well, and then add colloidal silica to thicken it. It will take a volume of silica about the same as the volume of the mixed resin. Add the silica in increments, mixing it in well after each addition. When the thickened mixture is the consistency of mayonnaise and will no longer run off the mixing stick, it is ready. Be sure to use latex gloves for the entire sequence, from mixing the glue to placing the last of the clamps. It will get messy.... A couple of paper towels are handy for wiping your gloved hands now and then.
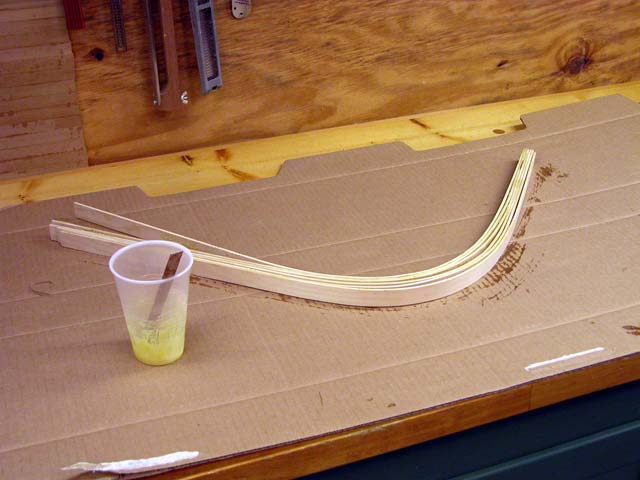 With the inner most
lamination laying on a piece of cardboard for bench protection, spread glue on the next strip evenly and
completely over the entire surface to be glued. The mixing stick can
be used, like a knife buttering toast. There should be glue over the
entire surface with no bare or dry spots, but not so thick that it will
later squeeze out all over the place. Lay the glued strip
against the first,
then add the next, etc., until the entire stack is glued. Move the
stack to the bending form and using a C-clamp, clamp it to the form at the
keel end. Make sure the ends are even and against the first boat form,
or stick out a little bit beyond the form for later trimming if the bending
form is in a vise. Add the next clamp in line, working toward the
sheer end. Keep the laminations centered
on the form and their edges aligned flush with one another. Aren't you glad
you used gloves? Paper towels can be used to keep the gloves
reasonably clean.
With the inner most
lamination laying on a piece of cardboard for bench protection, spread glue on the next strip evenly and
completely over the entire surface to be glued. The mixing stick can
be used, like a knife buttering toast. There should be glue over the
entire surface with no bare or dry spots, but not so thick that it will
later squeeze out all over the place. Lay the glued strip
against the first,
then add the next, etc., until the entire stack is glued. Move the
stack to the bending form and using a C-clamp, clamp it to the form at the
keel end. Make sure the ends are even and against the first boat form,
or stick out a little bit beyond the form for later trimming if the bending
form is in a vise. Add the next clamp in line, working toward the
sheer end. Keep the laminations centered
on the form and their edges aligned flush with one another. Aren't you glad
you used gloves? Paper towels can be used to keep the gloves
reasonably clean.
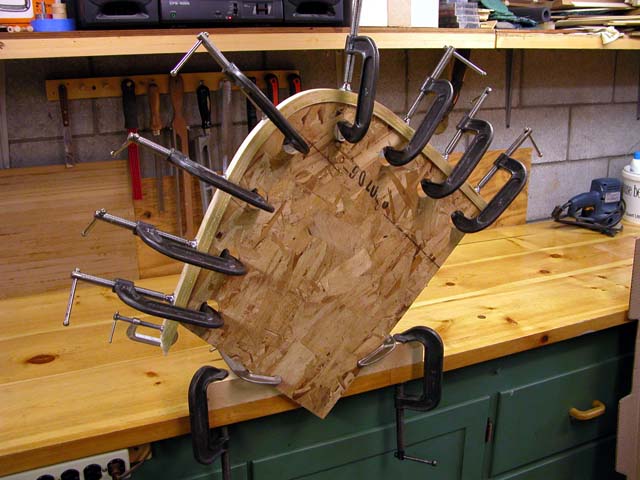
Stack glued, with C-clamps placed sequentially after gluing.
Some builders opt to use very thin strips and bend them dry without heating. If the strips are thin enough, say less than 1/8", and can be bent with only moderate hand pressure, then the clamping pressure will possibly be low enough to prevent joint starvation. Again, there is the question of whether the joints will be good or not. Eliminate the variable - bend the strips hot, and the clamping pressure when glued up will be adequate to hold the joints without excessive squeeze out.
Finishing up
Leave the glued up assembly to cure at least overnight. Once the clamps are removed, the next order of business is to scrape the squeezed out glue off the sides. This is easily accomplished with an ordinary paint scraper, sharpened, of course. A block plane will smooth the sides. I like to smooth one side, and run the other side through the thickness planer. Then do the side you hand planed, but limit the final thickness to 3/4". This should not be a problem if the edges of the laminations were held aligned and flush during the glue up. Remember, we cut the width of the laminations to around 7/8" to allow for this clean up.
Now cut or sand a round over on the keel end. This is the narrow edge that you see in the bottom of the boat. Also sand the edges over to break the sharpness on the inside of the stem only, and limit the edge softening to the lower half of the stem. Shaping the Stems describes shaping the rolling bevel.
The finished stem